Friday, 5 October 2012

My first painting in years....

Drawing was my first foray into the creative world and, although I'm not much cop, it's something that I go back to whenever I get the head space to do it.  I always feel that, to paint well, I need time and space and most definitely peace.  It's not a "Zen" thing, more that I get so involved that I don't really notice anyone else!  So, after years of occupied baby thoughts, I managed to squirrel away some time to paint. 
It takes a bit of doing in my rush-around life, I can tell you!   I have to try to get a week ahead on work, cleaning, laundry and all those daily jobs to free up a couple of nap-times to the task.  But, the push of my Mother's 70th birthday, gave me the push I needed.
  I knew I wouldn't get the time to sit outside and paint from nature *sigh* so I chose a favourite image from my Honeymoon.  We travelled up to Scotland, stopping off at Lake Windermere on the way.  Now, my husband is the photographer in the family (and pretty good he is too), but this is one I took and I just loved the light and thought it would be a step up from other paintings I have done.
I am finally at the age where I can paint and not freeze up, worrying that any more may spoil what I've already done.  This has always been my problem (and there are only so many times you can say that the half finished look is what you were going for...) but I soldiered on and am sooooo chuffed with how it came out.  So, without further ado, here it is!
 Here you have day 1 and day 2 final colour detail painting and the paintings done by my girls (of course they had to get in on the action)  I framed their work as well for their rooms and lovely they look too.  
Oh, by the way, she loves it!

Sunday, 16 September 2012

Back to work!


It's September and back to work!  It's been an exciting and hectic month as I am back to teaching my own class.  After a year of covering other teachers, running up and down corridors and teaching every year group, I am now settled in my own room with...my own cupboard (such a relief!). 
All my time at the moment is trying to keep up with the planning and marking whilst dealing with the hundreds of class set up details.  Seriously, every day is filled with stolen school minutes.  But no, I'm rebelling today with a sneaky breakfast cuppa and some catch up time.  I have a few posts to share with you which should fill up the gaps until I can pick up my crafty projects again.  I'm even going to squeeze in a couple at work!  I've recovered the window seat and WILL definitely do some granny square cushion covers.  Window painting next week though, I think...
Oh, almost forgot.  Here is the final piece of food for the final birthday lunch box.  "Tasty crochet"s best one I think- even Hubby loved it.  The card was a last minute quick fix for my friend's little girl.  I love how, when you have run out of card toppers, you can always find a crochet flower somewhere!  I think I need my sister's pink glue gun for these next time. x

Saturday, 18 August 2012

How to do a square knot (with bells on!)


I may have got a bit carried away with the bells.  It's just that it is such an easy pattern (from "Handmade Living" magazine July edition) that once I started, I kept thinking of more and more people who would love one.  It also used up a bag of tiny bells that I bought last year to make jingly baby balls.  The pattern is my idea of heaven.  Quick, simple, cheap and very effective. 
The bracelet uses simple square knots and  threading bells on at regular intervals.  This was a new technique for me and I found the square knot tricky at first.  The first two photos show how I did it.  The thread for bells was always the same strand so I found keeping the needle threaded helped me see which part of the knot I was on. 
1-You start with four threads and separate the first and last thread out for knotting. 
2-Left thread over middle two to make a loop. 
3-Back thread comes over the first thread, tucked behind the central threads and through the loop on the left. 
4-Pull these threads slowly and evenly to make half of the knot.  The needle is now on the right.
5- Repeat the process so that the needle ends up back on the left to make a square knot!
Hope this helps x

Thursday, 2 August 2012

Belated Birthday Bear.

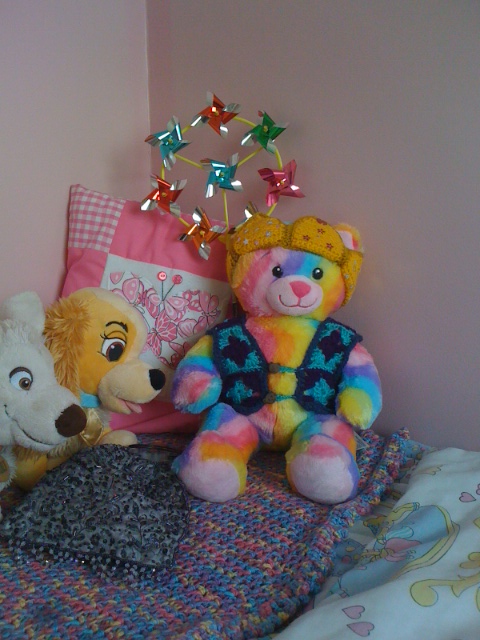
Ladies and Gentlemen....Presenting Penny Bear in all her Royal Glory!  I've been meaning to post this for a while as it was a lovely gift from one of my sisters for Katie's 6th birthday.  Isn't it ace?  The present arrived just as Hubby and I were rushing around to get ready for a surprise birthday meal.  It got packed in the changing bag and brought along when we picked  up the girls.  The evening was a riot of little girls having a whole restaurant wrapped around their dainty fingers and the crown- well- crowned it off!  Seriously, the waiters were enchanted by my little madam in a crown, placing her own orders and skipping around to introduce Penny to the chefs.  She basically had the whole restaurant wish her a happy birthday as we left (By name, I might add).  Baby Hannah wasn't going to be out done either as she sang "Twinkle Twinkle", danced to "Jingle Jangle  scarecrow" and flutter her little lashes to the waiters.  What finally sent me off into hopeless laughter was our charming waiter go down on his knee, hold out his arms and have both my little heart-breakers run into his arms to hug him goodbye.  I'm in for a rough ride with these two, I think!

Tuesday, 31 July 2012

To party or not to party??

That little Minx!  I had a fantastic "Charlie and the Chocolate birthday party planned for my little ones 6th birthday and she changed her mind just when I had gathered together party supplies and designed the invites!  This is what happens when they talk to other children- apparently, some of her gal pals thought that it would be "Too boyish" which, of course, put her off.  She then couldn't make up her mind and, over the next week she switched back and forth between ideas.
It's a shame as the games were going to be mega!  Oh well, we live but to serve, and managed to settle on a small family gathering, cake and a girls night out just the two of us at the movies.  I had a bit of fun designing a simple cake and trying out an icing bag with very basic success.  I put most of the issues down to the natural food colouring I used.  It seemed a good idea at the time but, the pale colours meant that i needed loads to achieve a sludgy colour which, in turn, thinned the butter cream too much.  She loved it though which is all that mattered and I've not been put off trying again another time.

Home improvements- Cath Kidston style!

I haven't been lazy this month- honest!  There's been lots of little jobs to finish and I'm getting into the whole mending thing (there always seems to be something that needs a tweak and a stitch).  Now thatt the holidays are here I've been able to attack some of those jobs that have been on the to-do list for a while.  I planned to jazz up my girl's curtains using my left over bunting fabric and was looking online for applique techniques but actually found a very simple technique in the Cath Kidston "Sew" book that I've been meaning to start since Christmas when I recieved it.  Don't they look fab!  I think I've morphed into Calamity Jane...I remember watching the "Never underestimate a woman's touch" song when I was little and thinking that putting ribbons on a chair was so far over the edge of taste that it was cringe-worthy.  Oh dear, how I have fallen.  I've chintzed up a perfectly simple set of curtains with the girliest fabrics around (Hate them, if you dare!)


Sunday, 1 July 2012

Sew, a needle pulling thread!


Greetings from the Von Trapp sisters!  This was a June project that had to wait until I could pin both girls down long enough to take a picture of them!  Don't they look like the fabulous curtain outfits made by Maria as play clothes?  Now that's what I call "Thrifty" (and bordering on the realms of cruelty to children)
These cute little headscarves were to allow crazy running around without losing their head covers- something which "accidently" seems to happen a lot with big sister.  But, oops, the triangles aren't deep enough for the point to be tucked into the tied up scarf so instead we get that comical blindness as the tail flips over the face as they run around.  
This is just a variation of my pretty bunting.  
1-Hem a triangle around the two diagonal edges.
2-Fold bias tape over the straight edge leaving long enough tales.  
3-Stitch straight across bias tape to make the ties and Bob's your uncle!