


Oh, this bunny is so late! In fact, he's so late that he should be a white rabbit with a pocket watch... I made him for my baby nieces first birthday. I had started by making her a rainbow poncho and decided that a little cuddle bunny was needed to finish it off. Of course, the bunny was so cute that I felt a mini poncho was in order and he's so sweeeet!
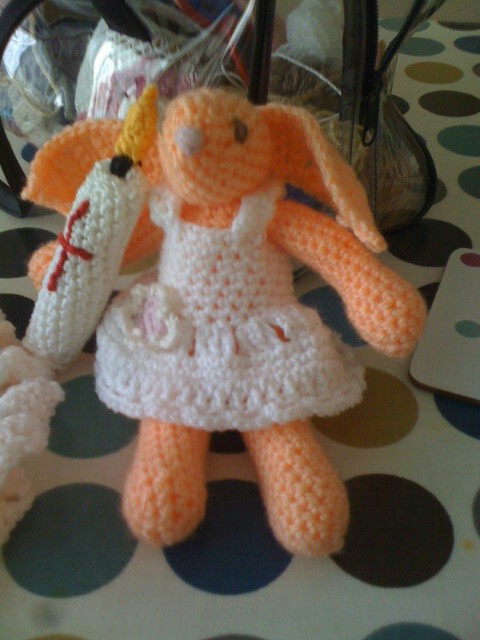
I did the usual quick flick through books and free ravelry patterns but couldn't find a really simple and quick bunny so I took a breath and had a go on my own. I have been holding off posting this as I wanted to use the pattern to check for blips. The perfect excuse came for my neighbour's baby Baptism. I just couldn't resist making a follow up"Baptism Bunny" along with candle, shawl and little white dress. I will add another pattern page for the lovely extras another day. But, for now, TA DA- here is my first attempt at a crochet pattern. I offer it up to the www as a gift for all the freeby patterns I have enjoyed as a crafty. Let me know if anyone uses it- I've already thought of loads of adaptations and outfits for mine...!
You will need:
Any odds and ends of wool (acrylic is a good washable choice for baby drool)
size 3.5 hook ( I used a size 3 hook but I stitch big )
Instructions:
Legs (make 2)
1. Ch 2, 6sc in 2nd chain.
2. Continue in a spiral with 2sc in same stitch followed by 1sc. Repeat all round-9 stitches.
3. Continue in spiral with 2sc in same stitch followed by 2sc. Repeat all round-12 stitches.
4. 12sc, then continue spiral to reach desired leg length (mine were approx. 8.5cm) and fasten off leaving a long tail.
5. Make leg two but don’t fasten off. Join with a sc and sc all around to join the two legs (start of the body).
6. Stuff legs now and use long tail to close the small gap between the legs.
Body
1. Continue sc for body up until the point where you decrease for the shoulders (about 4cm).
2. Smooth flat and aim to put decreases in the side corners. 2dec and 2dec (4 stitches into 2), 8sc and repeat -20 stitches.
3. Sc all the way around once.
4. 2dec, 8sc and repeat- 18 stitches.
5. Sc all the way around once.
6. (2dec,1sc) repeat all the way around- 12 stitches.
7. Stuff body- Push a little extra at the front for a tummy, but not right to the top of the legs. This will help your bunny sit!
Neck
1. Sc all around once and fasten off- 12 stitches.
Head
1. Ch 2, 8sc in 2nd chain- 8 stitches.
2. 2sc in each stitch- 16 stitches.
3. 2sc followed by 2inc and repeat all the way around- 22 stitches.
4. Sc all around for 4 rounds- 22 stitches.
5. 4sc, 2dec and repeat 3 times. 4sc to end the round- 18 stitches.
6. 3sc, 2dec and repeat 3 times. 3sc to end the round-15 stitches.
7. 2sc, 2dec and repeat 3 times. 1sc to end the round-11 stitches.
8. Stuff the head.
9. Sc all around- 11 stitches.
10. 2dec 5 times- 6 stitches.
11. 2dec 3 times and fasten off.
Arms (make 2)
1. Start as legs with Ch 2, 6sc in 2nd chain.
2. Continue in a spiral with 2sc in same stitch followed by 1sc. Repeat all round-9 stitches.
3. Continue in spiral with 2sc in same stitch followed by 2sc. Repeat all round-12 stitches.
4. 12sc, then continue spiral 2 to 3 times for the hands- 12 stitches.
5. 2dec, 4sc, 2dec, 4sc- 10 stitches
6. Continue sc around to your desired length (mine were approx. 8cm).
7. Fasten off leaving a long tail for stitching on.
8. Stuff, leaving a “pinching” space at the top of each arm to stitch on. This makes a nice shoulder shape.
Ears (make 2)
1. Ch 3, sc in 2nd and 3rd chain. Turn.
2. Ch 1, 2sc in both stitches- 4 stitches.
3. Ch 1, 2sc in first stitch, 2sc, 2sc in last stitch- 6 stitches.
4. Ch 1, sc to end.
5. Repeat 5 rounds of sc.
6. Ch 1, 2dec in first stitch, sc along and 2dec in last stitch- 3 stitches.
7. Ch 1, sc to the end. Repeat 3 times.
8. 2dec over last 2 stitches.
9. Ch 1 and sc around the edge, adding 3sc in the tip of the ear.
10. Sl st to the top edge and fasten off.
11. Leave a long tail to sew ears on.
Tips for stitching up
Head-Sew head on before arms to avoid a hunching Bunny! Use whipstitch to attach.
Arms- Pinch the top and whipstitch shut. Pull slightly to gather the arm and stitch above and below to add strength to the join.
Oh Thea how gorgeous is that bunny?!? I'll definitely give this a try xx
ReplyDelete